Recipient Authentication
When adding a recipient to a document, you can choose to add an access code that the recipient must enter in order to access and take action on the document. The is a great way to make sure you have the right person engaging with sensitive documents.
Authentication is done per recipient, not per document. This means you can choose to require some people to authenticate while allowing others to access the document without authentication.
It's common to add authentication when you're first preparing a document and adding recipients to the document. However, you can also add authentication to existing recipients on a draft document, templates, and even in-flight documents.
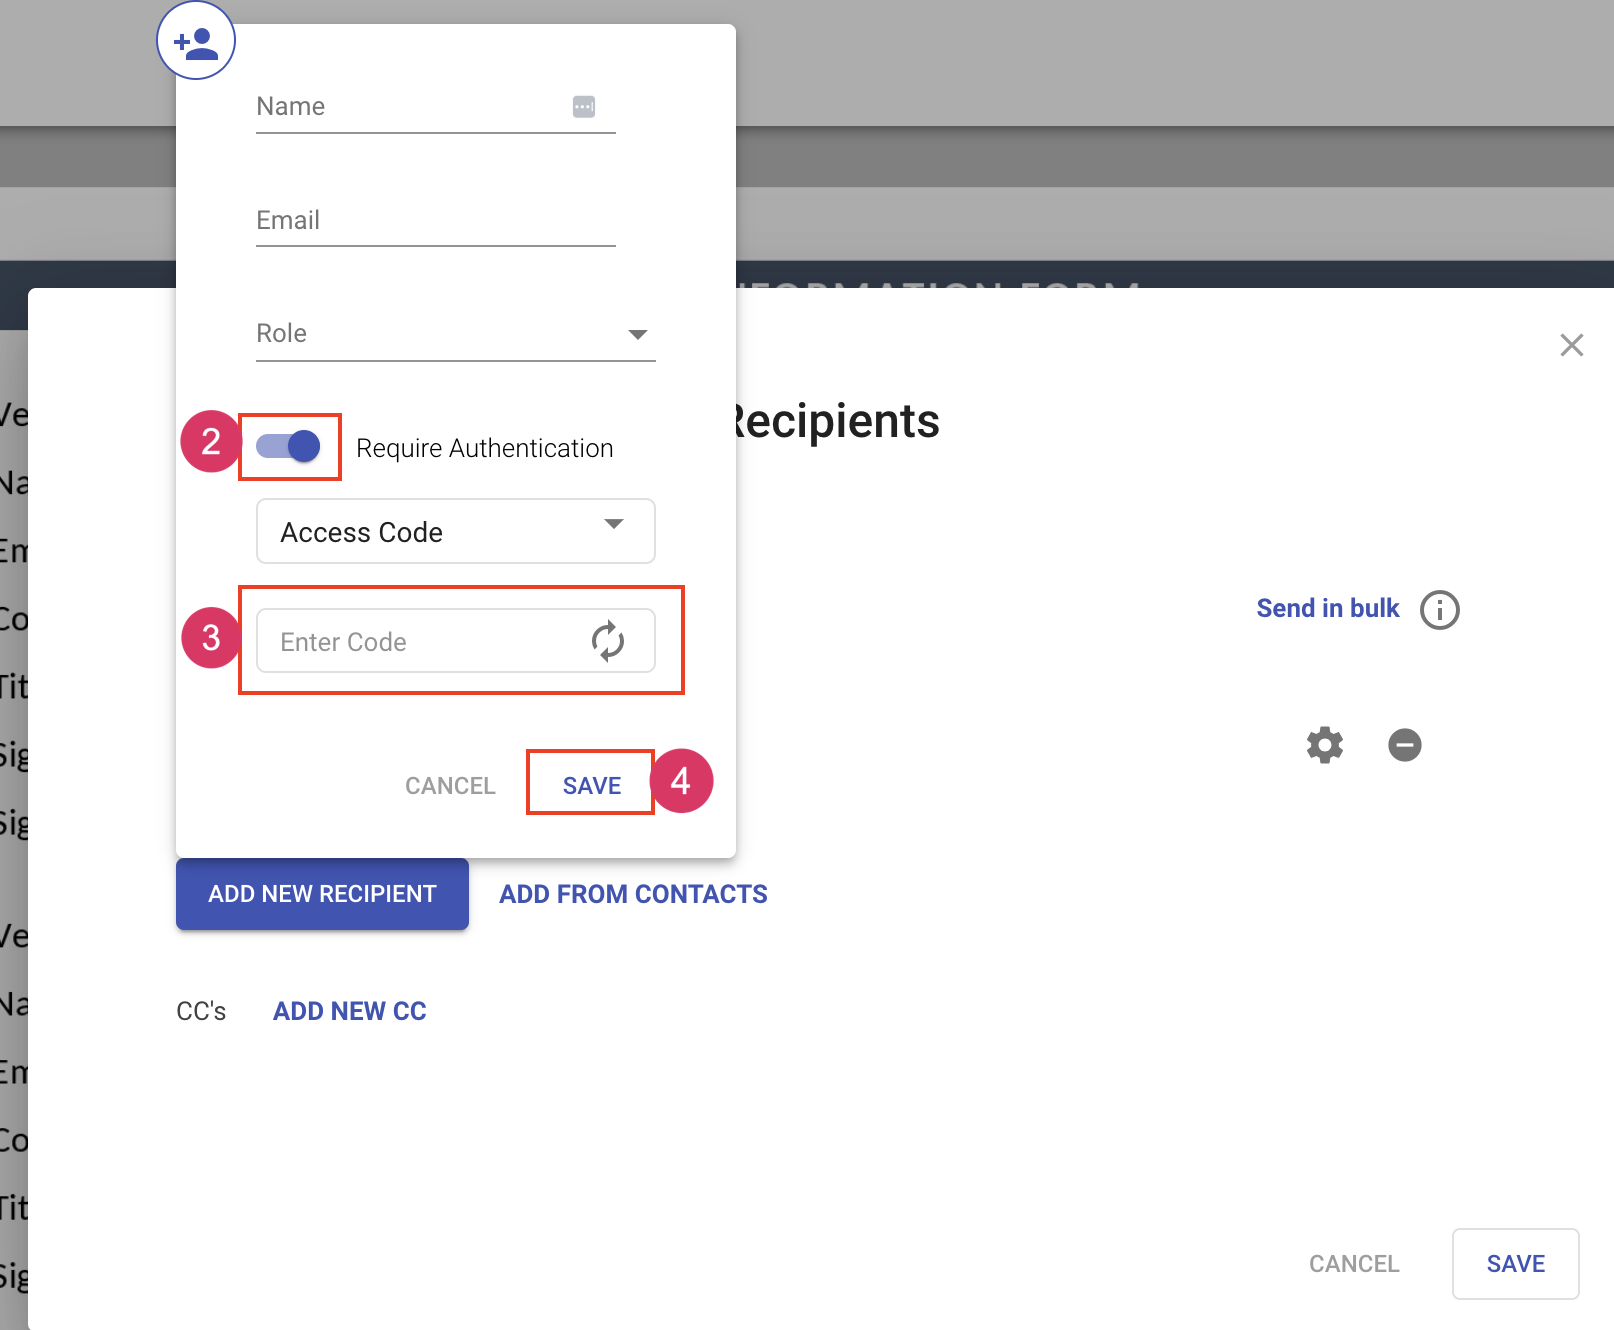
When adding a new recipient
- From the manage recipient dialog, click More Actions to expand the dialog
- Turn on the authentication setting
- Enter the access code
- Click Save
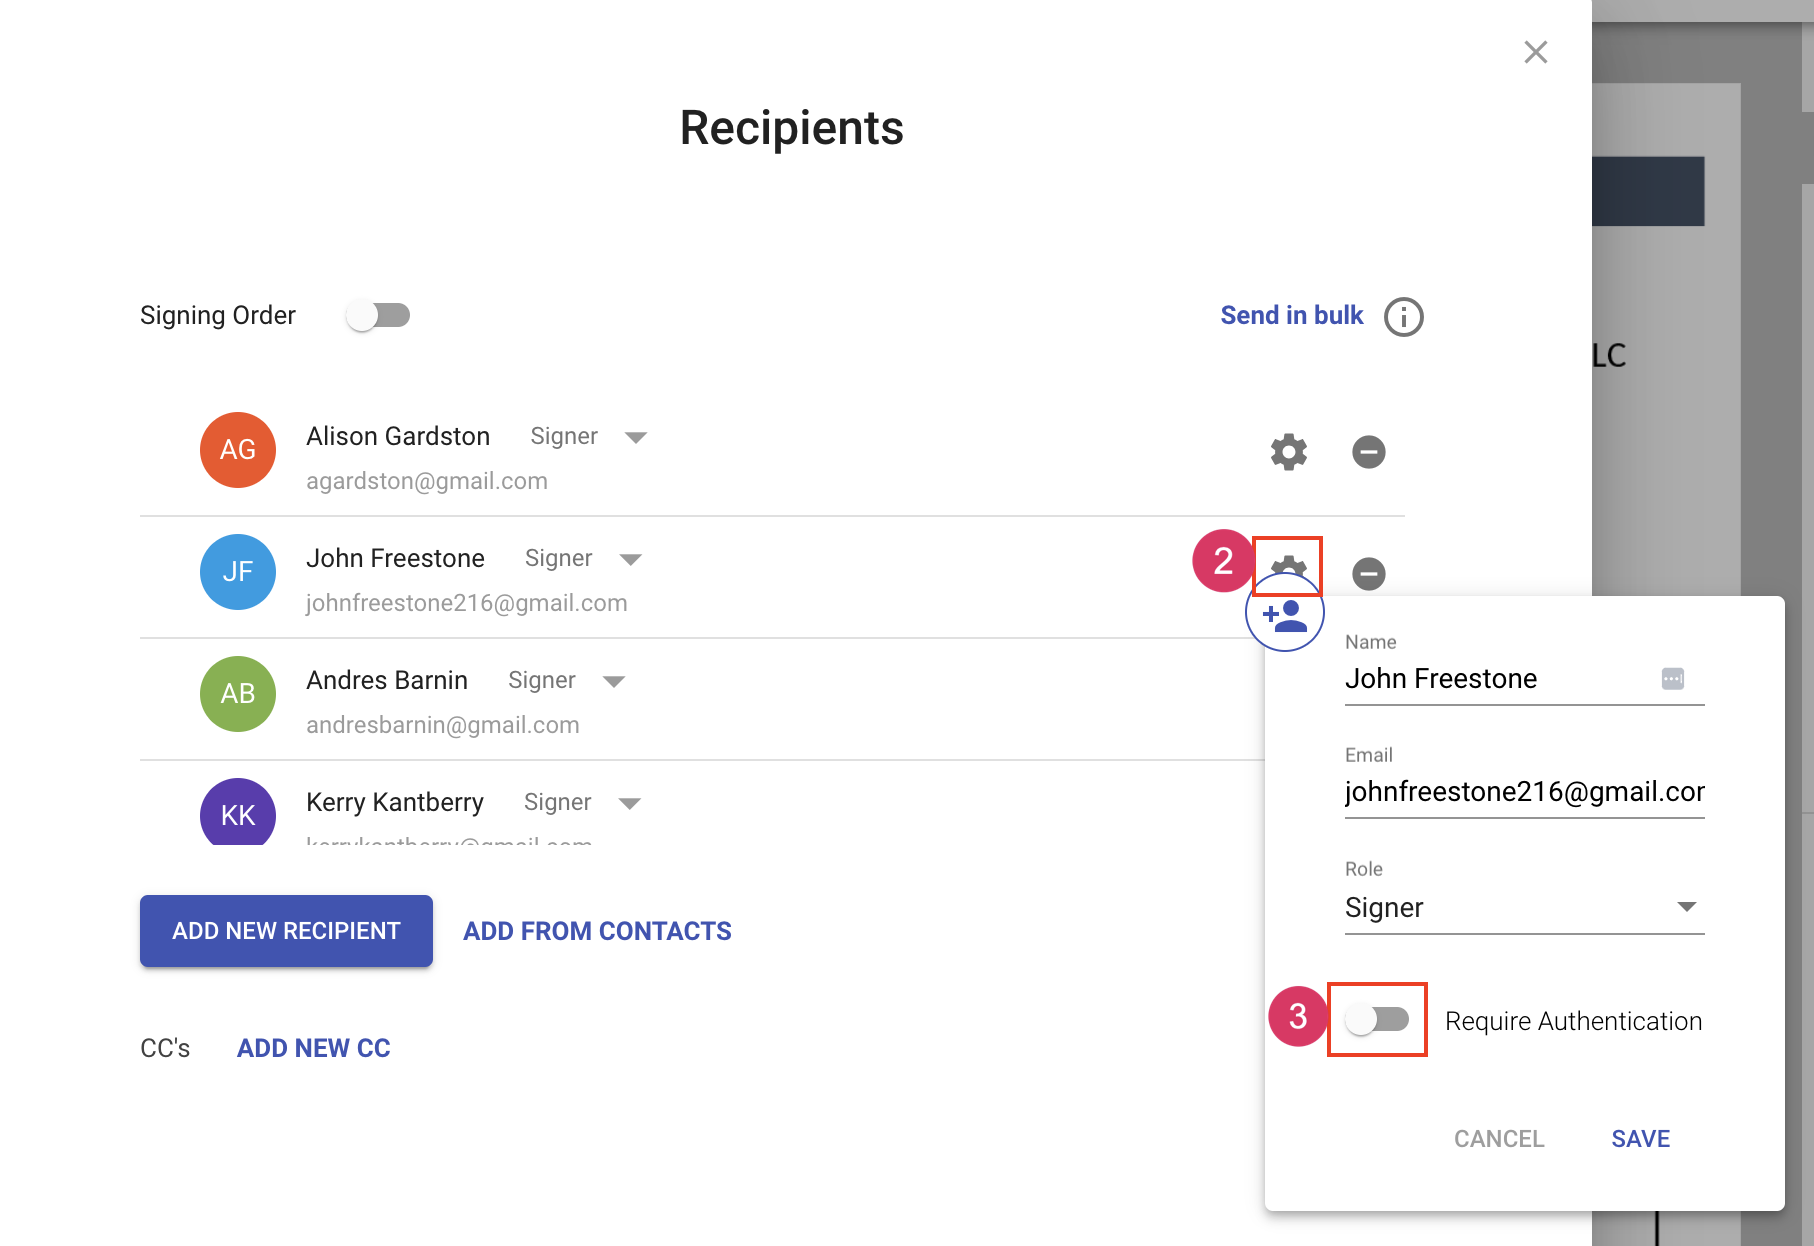
When adding a recipient from contacts or modifying a recipient
- From the manage recipient dialog, click More Actions to expand the dialog
- Click the gear icon to edit the recipient
- Turn on the authentication setting
- Enter the access code
- Click Save