
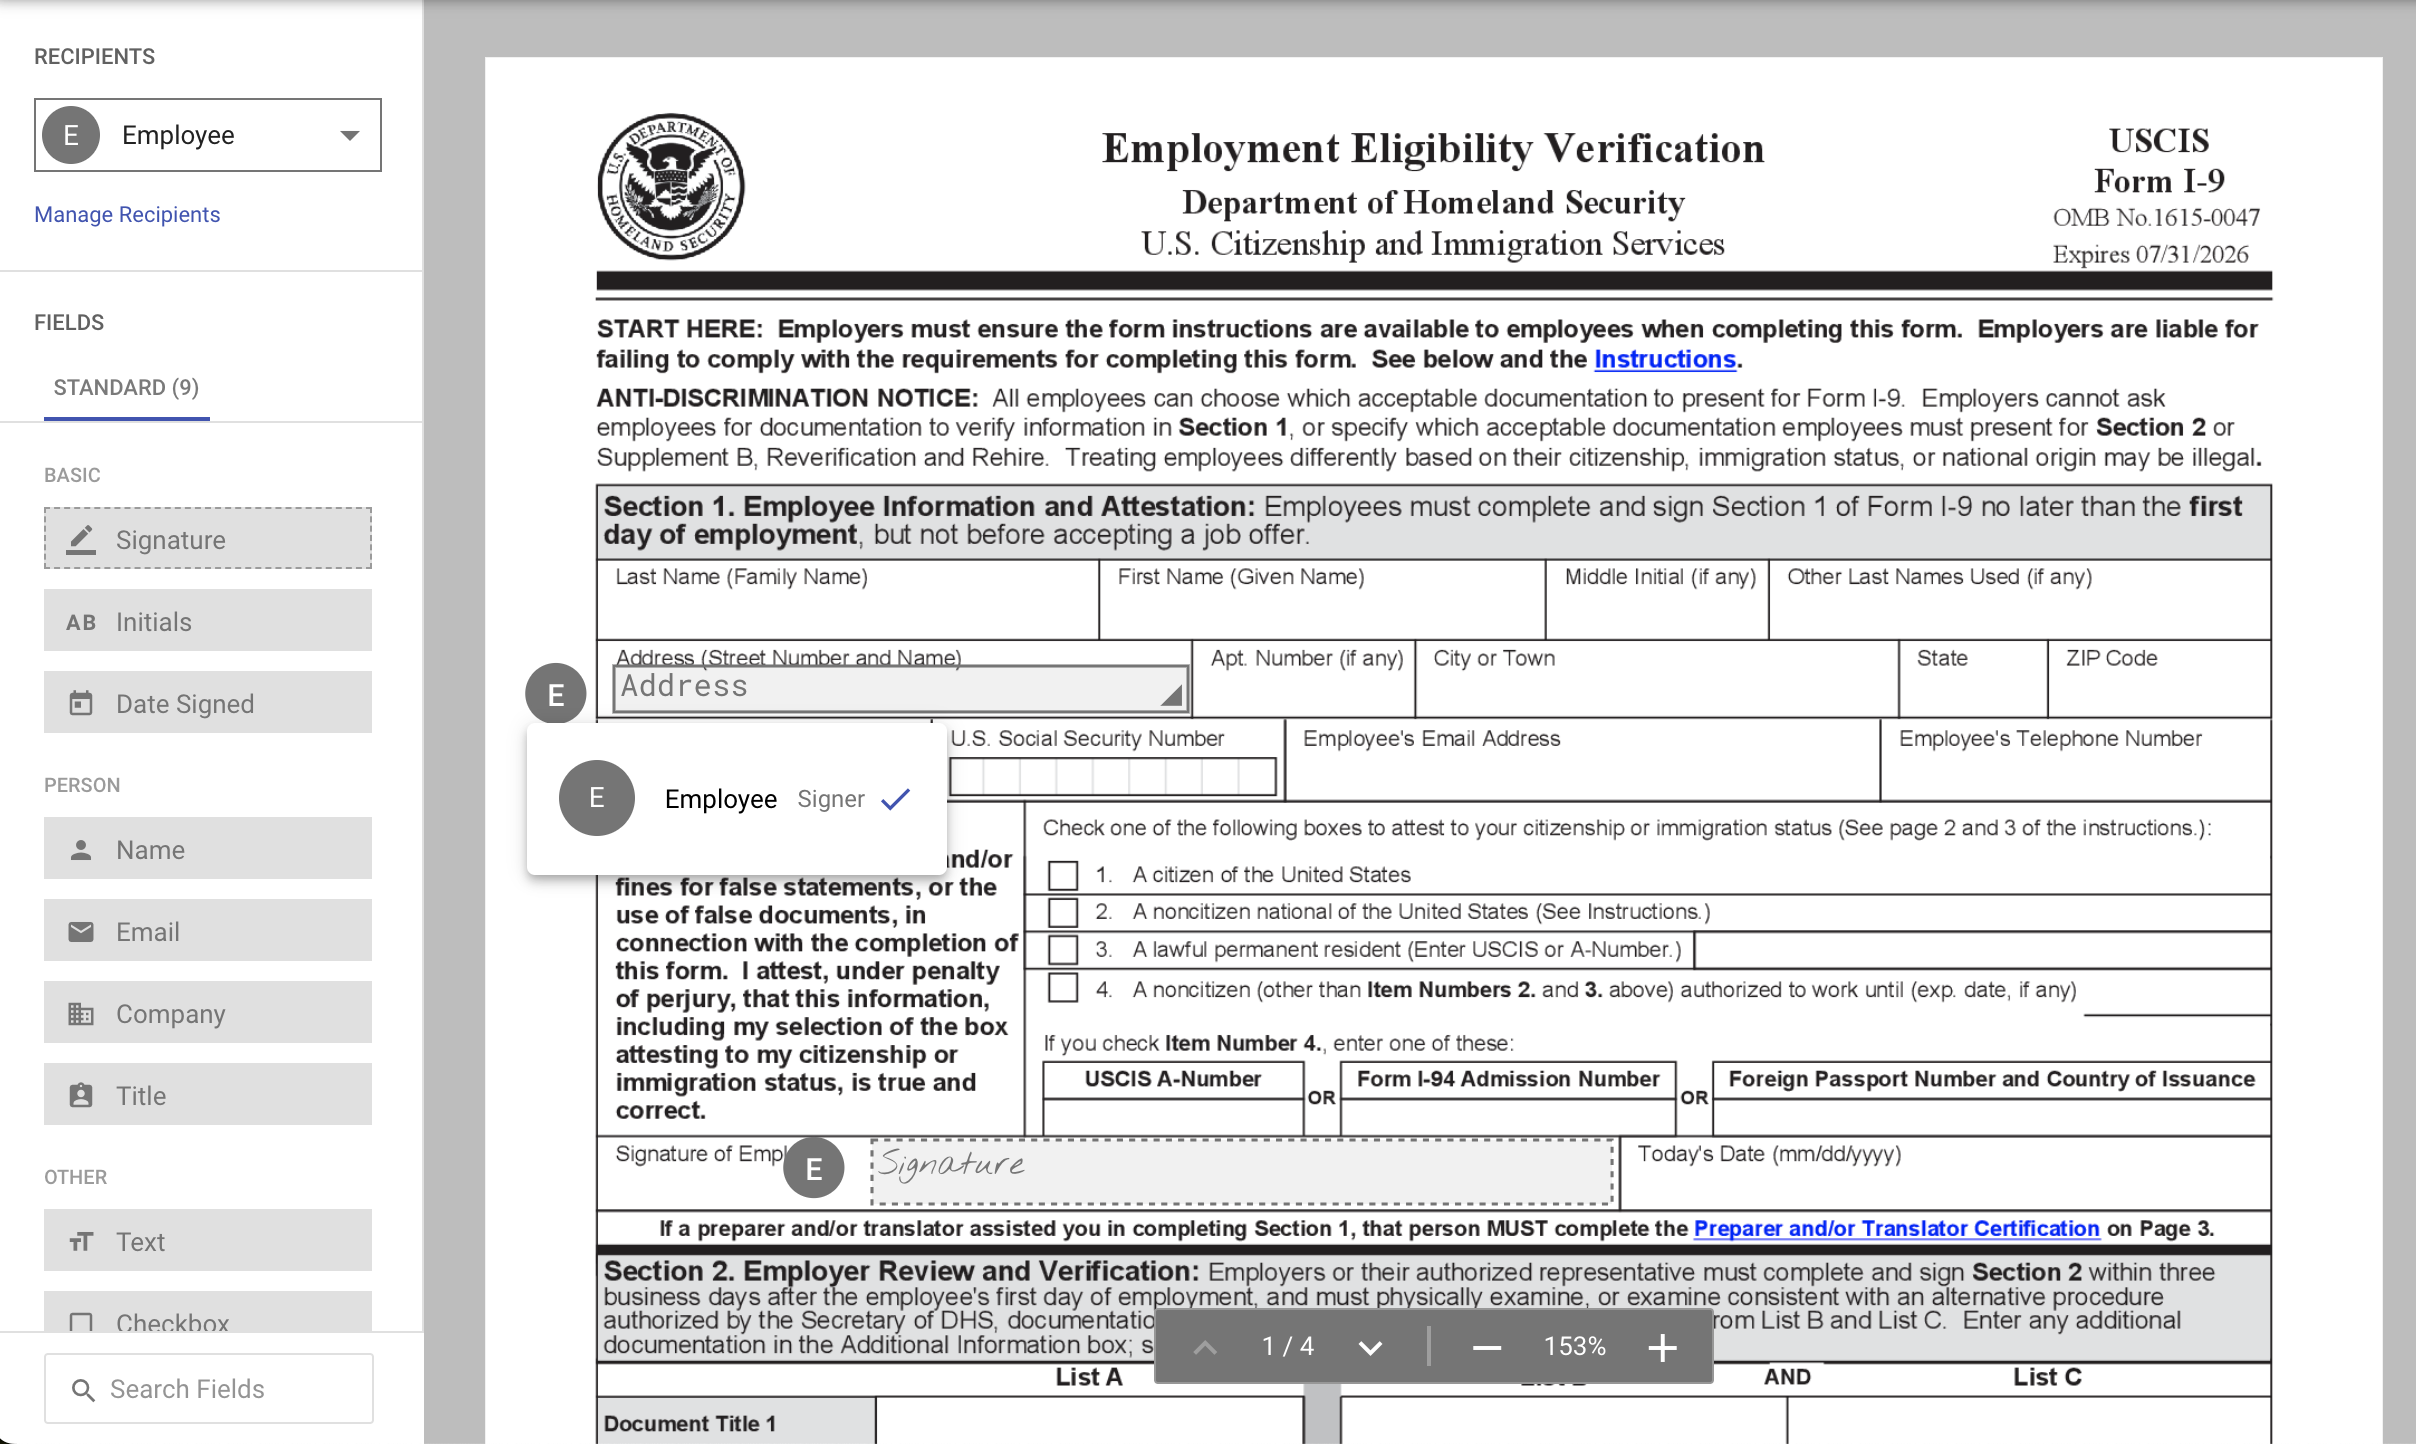
Adding Fields to a Template
Fields are used to request information or action from your recipients. Upsign offers a variety of default fields which you can customize as you add them to the template. When adding fields to a template, you can either:
- Add fields first and then add and associate recipients
- Add the recipients first and then add associated fields
Add the fields and then associate a recipient
To add fields and then associate recipients, take the following steps:
1. Add a field
Add a field from the left panel by:
- Click and move - Click a field in the left panel and then move the cursor to the location you want the field to be place on the document. Click to place the field.
- Drag and drop - Click a field in the left panel and drag to the desired location on the document

2. Align fields
Align the field in the space you want it to be visible to the recipient (e.g., if there’s a signature line on the document, align the field to the left side of the signature line). As you drag the field around on the document, you’ll also see lines to make it easier to align to other fields and locations on the document.

3. Size the fields
Size the field by dragging the bottom right corner of the field. The signature field, specifically, should be sized to fit the space you want it to fill. The recipient’s signature will be sized to fit within the bounds of the field box.

4. Modify field settings
Specify field settings by clicking on the field. A panel will load in the right sidebar where you can adjust settings for the field. Clicking elsewhere on the document will close the field settings.

5. Assign a recipient
Assign a recipient by clicking the icon to the left of the field or by clicking the add recipient button in the field settings panel.
5. Click Review and Send to move to the final step.
Next Step: Review & Save